Only 3 steps, and you can use custom domain for your GitHub Page!
Step 1, get your domain
Of course, you’ll need a custom domain for your page. There are various ways to get, meaning register or purchase or subscribe, a domain. There are many providers on the Internet, among which I would certainly recommend Google Domain, though it seems to be in beta version for now.
Find the site for Google Domain (I’m sure you can do it), and search for the domain name you desire. Make sure it is available right now, since lots of people seem to like occupying many domains without doing anything with them, and pay for that domain, normally at $12/month. My example is “allenstark.com” illustrated below.

Step 2, add CNAME file to your page repository
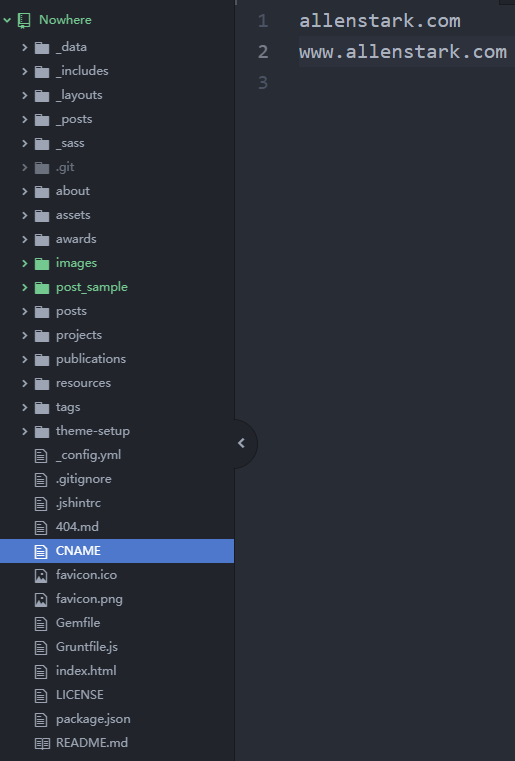
In your GitHub Page repository, add a file named “CNAME”. Input as below with your own domain name you just lose your money to, and make a commit with push to the repository.

Step 3, set DNS
This step is a little tricky. First click your domain to enter the management page, and find DNS on the left tab. Scroll down and make two additions to the “Custom resource records” section. One is the records of the current IPs for GitHub, which can be found here. The other is a CNAME-type with name “www” and data “yourrepo.github.io” to allow using “www” before your domain to access your page. Finally, it should look like below.

After that, settle down and drink a cup of coffee to let the magic become true. Now try using your purchased domain to visit your GitHub Page. It should be… LIVE!
Extra step, enforce HTTPS
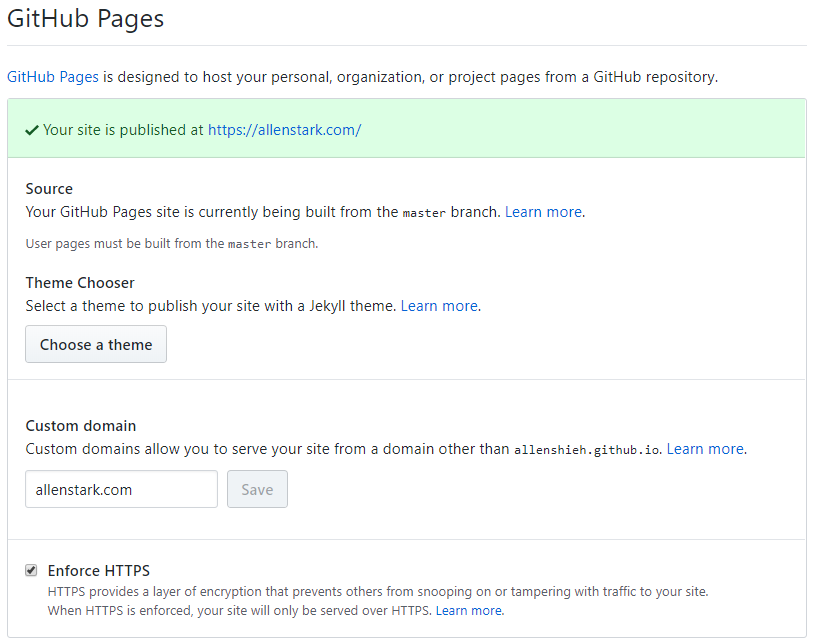
This is just a recommendation, always enforce using HTTPS for your website! Go to the setting page of your repository and make sure you tick the box for HTTPS shown below.

Cheers, until next time!
